Up and running 1 - Installation
This part of the guide will show you what programs you need to install and what files to download to get your MTS system running.
Software
You will need to install the Hercules S/370 emulator and a 3270-compatible terminal emulator.
Hercules
The Hercules S/370 emulator is needed to run MTS. Go to the Hercules web site to download the latest version - source code is available for Unix derivatives and pre-built binaries for Windows.
I would recommend you get the latest version (currently 3.12) as previous versions have an issue that prevent batch printing working correctly. Hercules 4 will also work: see this discussion.
Prepackaged versions are available for Linux, eg Debian and Ubuntu, but these tend to be older versions so best to get the source code and compile it yourself on these platforms.
Follow the installation procedure to get the source or binaries installed. You do not to follow the configuration or DASD creation procedures using this guide.
3270 terminal emulator

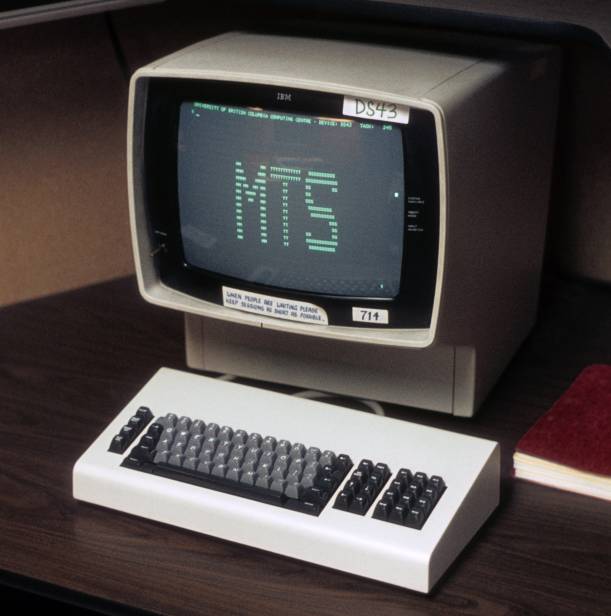
From "IBM 3277 Display" by Gavin Eadie - picasaweb.google.com. Licensed under CC BY-SA 1.0 via Wikimedia Commons.
The IBM 3270 terminal acts as the operator’s console and for user sign-on sessions. Unless you have an old one lying around, you will need to install an emulator that can connect to Hercules.
The MTS archive has a good guide on what emulators are available - pick one for your platform. To use MTS effectively you will need to be able to use special keys like PA1 - see the documentation for your emulator to find out how to do this.
Files
You will need the D6.0A MTS distribution, the virtual tape files from the D6.0 distribution and the up-to-date Hercules configuration file.
MTS D6.0A distribution
MTS was distributed as sets of tapes; the latest version was D6.0 from 1988. D6.0A is an updated, packaged, version of D6.0 that includes bug fixes and minor changes to get it running smoothly on Hercules. Work is underway to get a bootable version of MTS from the time it was shut down in the 1990s, but for now D6.0A is the latest available.
The best source at present for this is a collection at archive.org. You want the file d6.0A.zip.
Unzip the file and change directory to the mts/d6.0A directory.
MTS D6.0 tape files
The D6.0A distribution only contains enough to get a bootable version of MTS; to install other software from the distribution you will need the tape files from D6.0. Get this from Bitsavers
Unpack this somewhere else and copy mts/d6.0/*.aws to your mts/d6.0A/Tapes directory created in the previous step.
Note that the archives were created on a Mac, so if you are not on that platform you will see directories like __MACOSX and files starting with .. You can safely ignore or delete these.
Updated Hercules config file
The version of the Hercules configuration file in D6.0A has a minor bug; pick up the latest version of the file fixing this from the MTS archive.
This file is enough to get MTS started but there are many options that can be tweaked. The only change I’d recommend to make now is to enable printer support if you have Hercules 3.10 or later; search for PTR2, uncomment the first line and comment out the next two lines with # as below:
000E 1403   Units/PTR2.txt lpp=66 fcb=1:11,4:1,5:5,8:10,14:6,19:4,24:7,34:2,44:6,49:4,54:7,63:8,66:3 optprint # PTR2
#000E 1403  Units/PTR2.txt nofcbcheck  # PTR2
#000E 1403  Units/PTR2.txt             # PTR2
Copy this file to mts/d6.0A, overwriting the previous version of hercules.conf, eg:
cp /path/to/MTSD6.0A.cnf hercules.cnf
Both D6.0 and D6.0A include a directory mtsDistDocs containing useful information which you should save elsewhere to read later.
Ready to boot
If you’ve completed the above steps, the contents of your d6.0A directory should have at least the following files:
hercules.cnf
Disks/mts600.dsk
Disks/mts600_1.dsk
Tapes/cmd001.aws
Tapes/d6.0dr1.aws
Tapes/d6.0dr2.aws
Tapes/d6.0dr3.aws
Tapes/d6.0t1.aws
Tapes/d6.0t2.aws
Tapes/d6.0t3.aws
Tapes/d6.0t4.aws
Tapes/d6.0t5.aws
Tapes/d6.0t6.aws
Tapes/d6.0util.aws
Units/PCH1.txt
Units/PTR2.txt
Units/RDR1.txt
If so, you are ready to move on to the next stage - booting the system for the first time.
